> For the complete documentation index, see [llms.txt](https://wamoca.gitbook.io/wamoca-docs-en/llms.txt). Markdown versions of documentation pages are available by appending `.md` to page URLs; this page is available as [Markdown](https://wamoca.gitbook.io/wamoca-docs-en/our-platform/campaigns.md).
# Campaigns
**Before you continue, make sure you have:**
* **Connected your whatsapp account**
* **Configured your time zone in Settings > General**
The campaigns module allows users to efficiently create and manage WhatsApp campaigns.
## List of campaigns
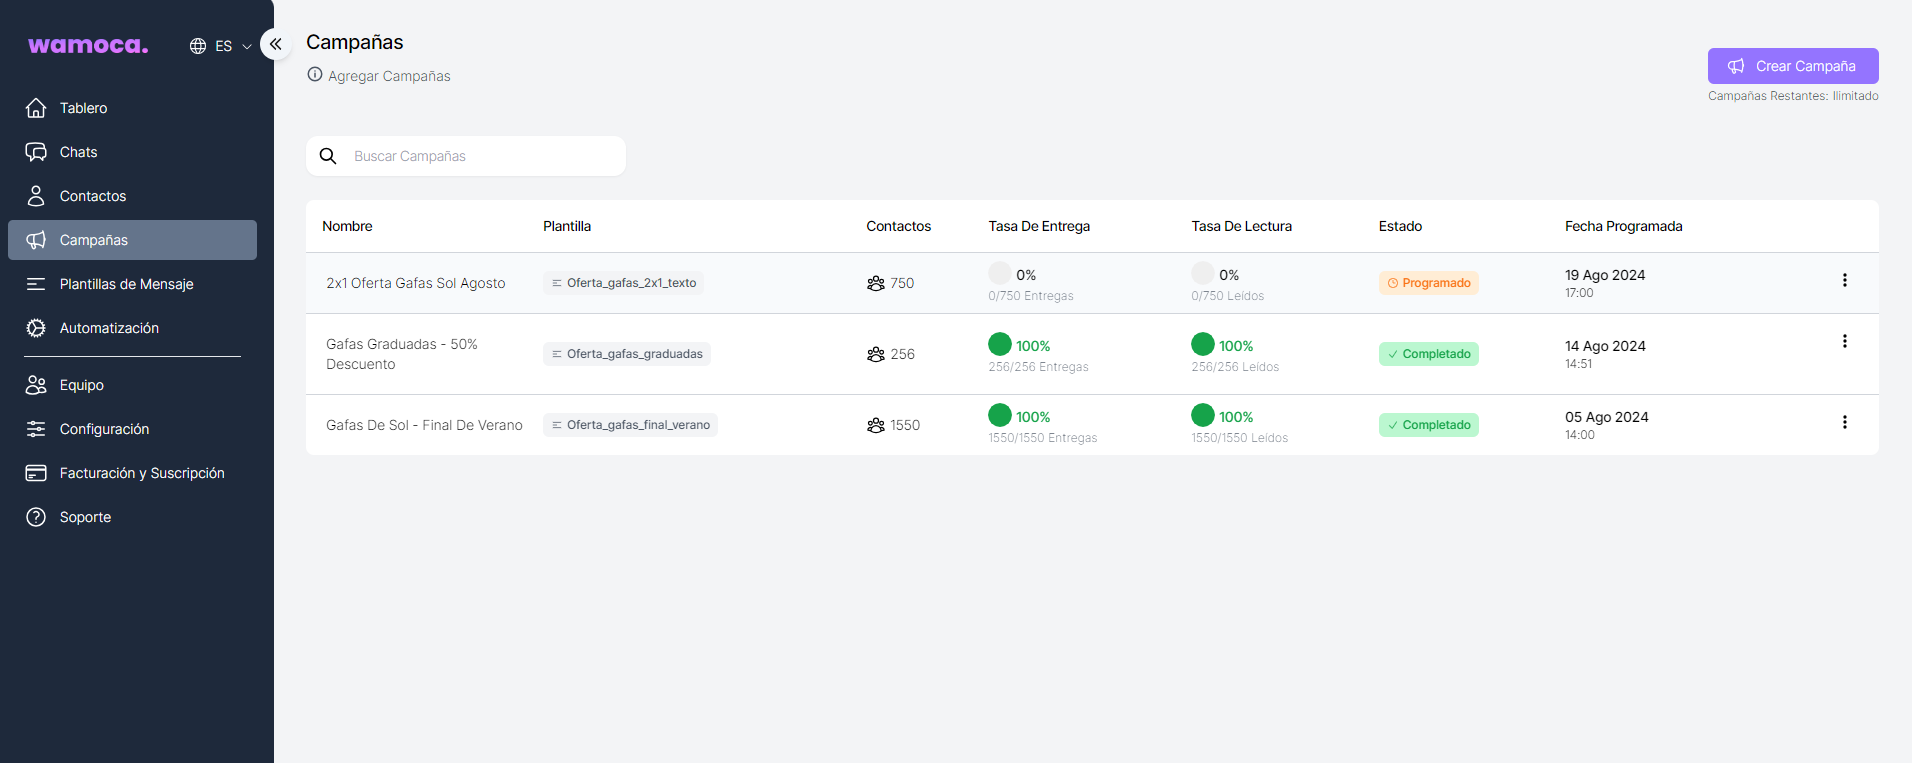
The list will show the campaigns created by the user with the following columns:
* **Name**: name of the campaign
* **Template**: WhatsApp template used in the campaign
* **Contacts**: total number of contacts
* **Delivery Rate**: message delivery rate
* **Read Rate**: message reading rate
* **Status**: status of the campaign
* **Scheduled**: the campaign has not yet been implemented and has a future date for implementation
* **On going**: the campaign is running
* **Finished**: the campaign has been implemented and completed
* **Scheduled date**: date to which the campaign is scheduled to take place.
List of campaigns
## List of campaigns
On the campaign creation screen we will find:
### Basic data
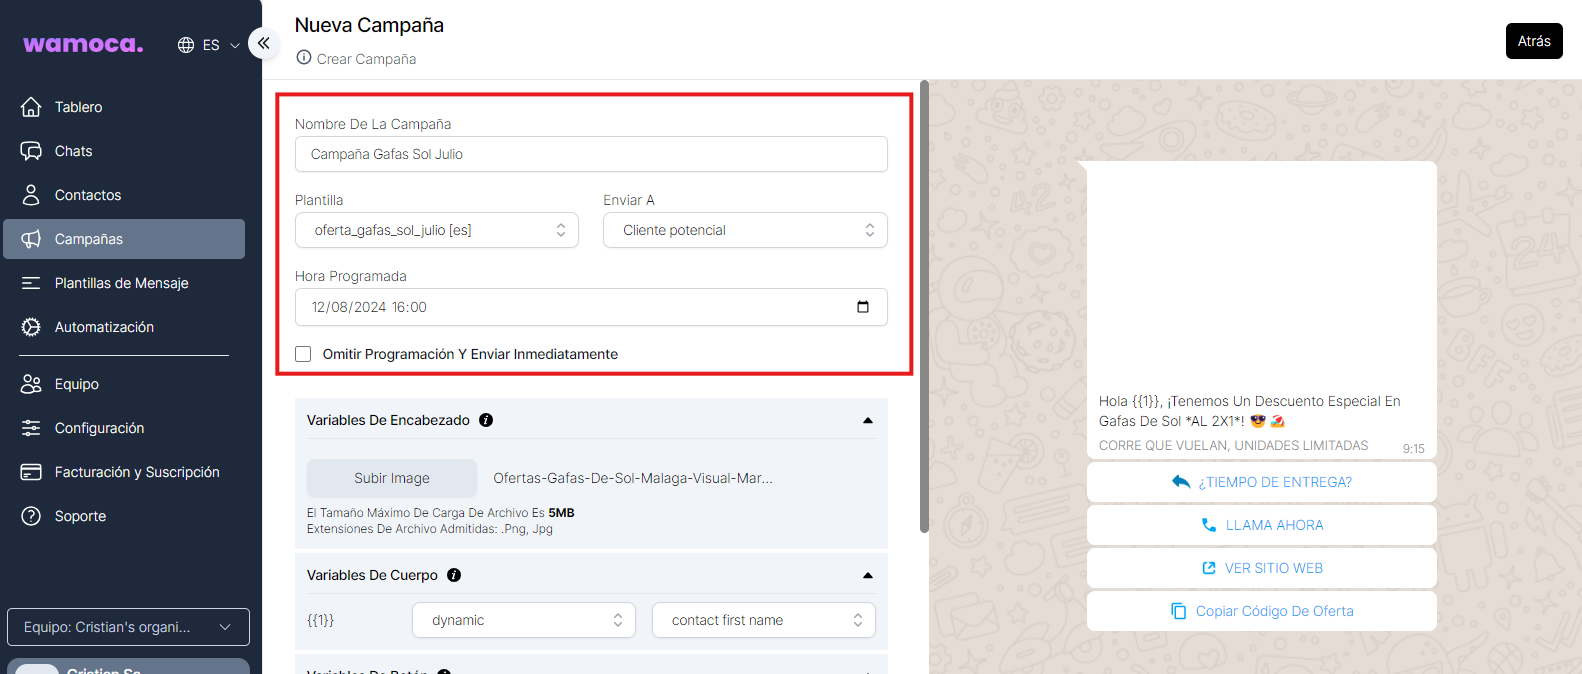
Basic campaign data
These are the basic details of the campaign:
* **Name** of the campaign
* **Template**: WhatsApp message template that we must have created previously
* **Send to**: the group of contacts to send the campaign to
* **Scheduled time**: date and time at which we want to send the campaign (it can also be sent immediately if we select the ‘Skip scheduling’ checkbox).
### Message template variables
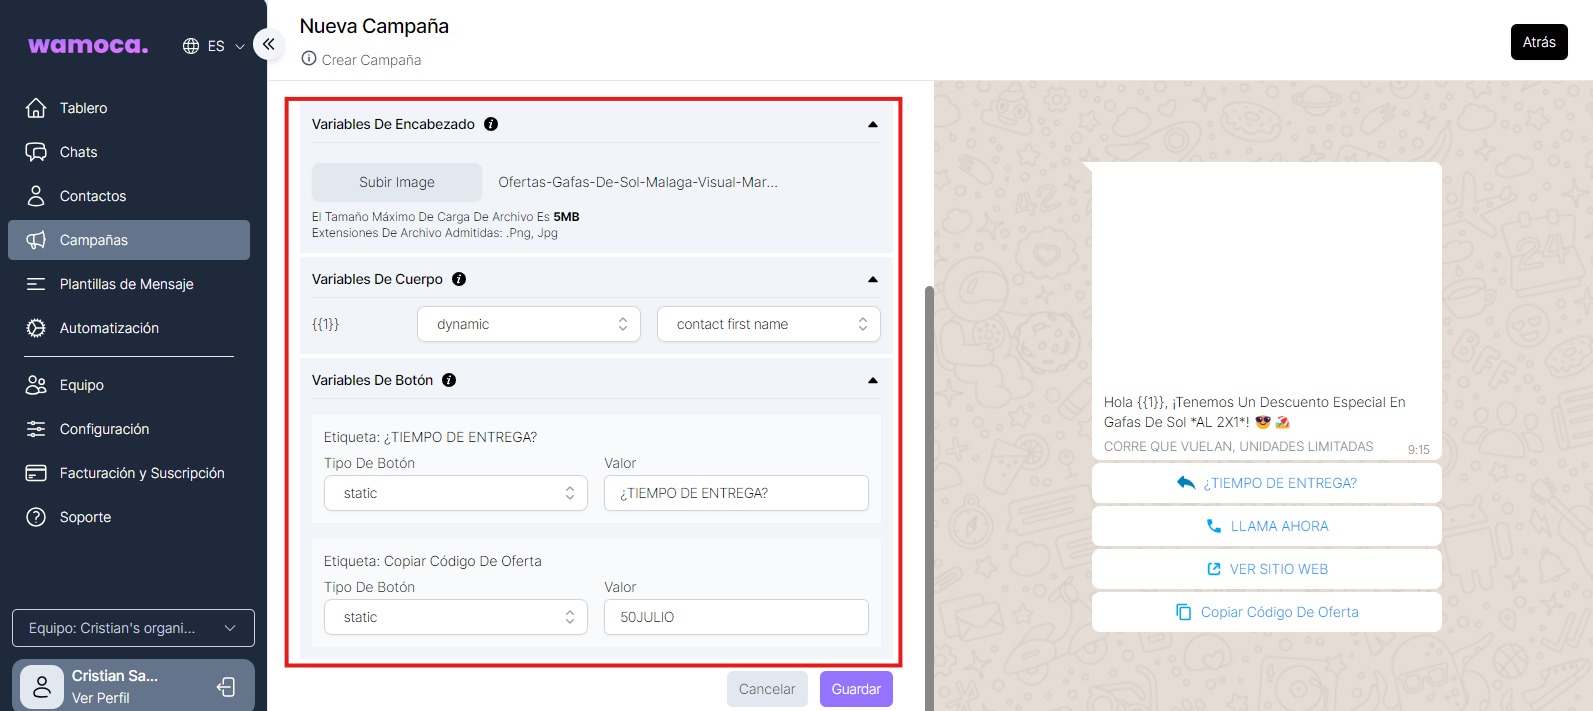
Depending on the design of the WhatsApp message template used, some fields will appear or others. In this case, we have used several fields to see it in more detail:
#### Header variables
This field refers to the header of the message. In this example, we have used an image as a header. To include it in the message, click on the ‘*Upload image*’ button and select the desired image.
#### Body variables
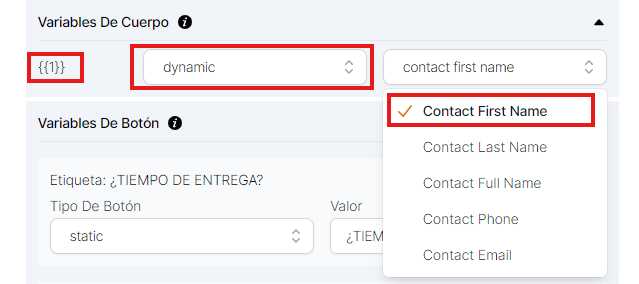
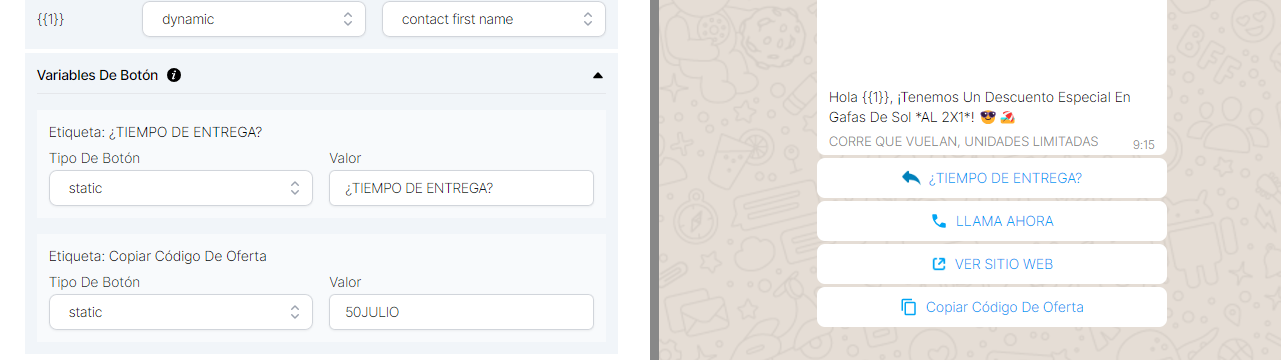
This field refers to the body of the message. In this example we have used a text with a variable called {{1}}, which we will dynamically replace with the name of the client: ‘*Hello {{1}}, we have a special discount on sunglasses at 2X1! 😎🏖️*’ To do this we will have to select the option ‘*dynamic*’ and the field ‘contact first name’:
Dynamic variable message body
Now the text that the user will receive will be: ‘***Hi Cristian**, we have a special discount on sunglasses AL 2X1! 😎🏖️*’
**Button variables**
Button variables
This field refers to the buttons or CTAs of the message. In the case of this template, we use four buttons:
* **URL**: external link that is configured directly in the template
* **Phone**: phone or mobile number that is configured directly in the template
* **Copy Offer Code**: offer code that can be copied and modified from the campaign
* **Label**: custom button, whose value can be modified from the campaign. Once the user presses the button, it will send a message with that value. This type of buttons are very useful for autoresponders.
### **Campaign details**
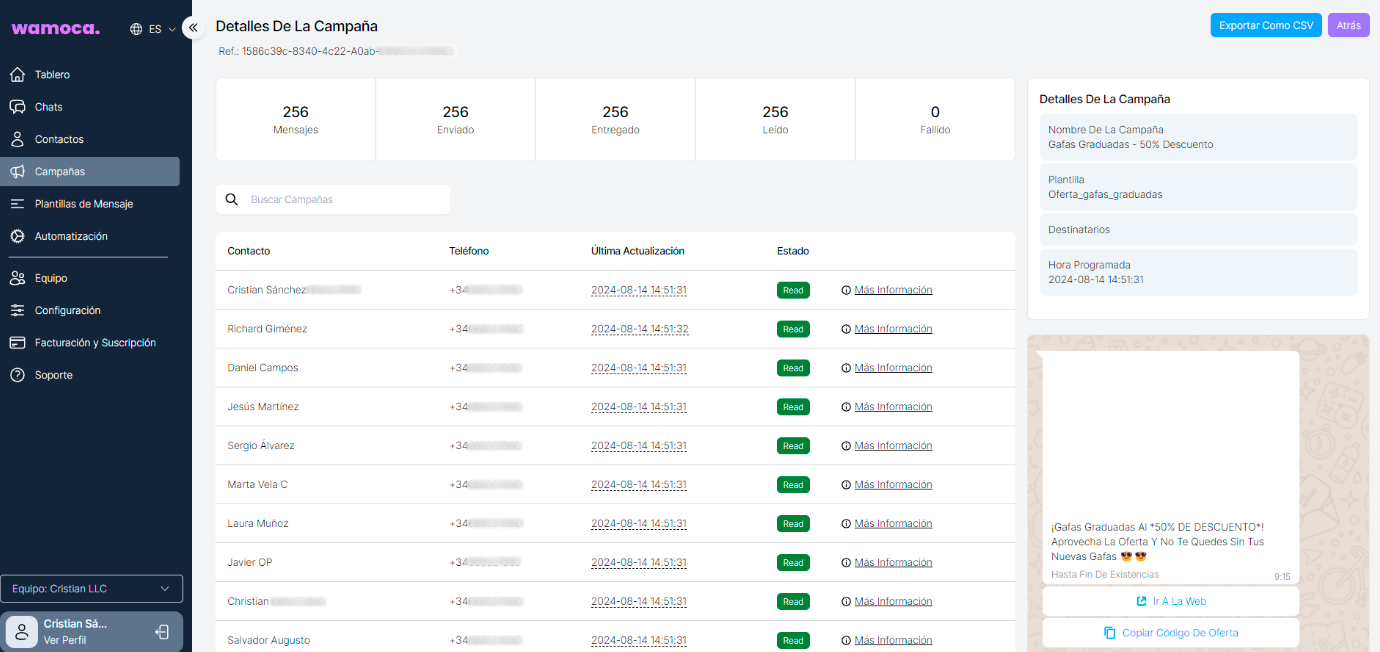
In the details screen you can analyse the campaign in more detail by viewing the following metrics:
* **Total contacts**
* **Messages sent**: number of messages sent
* **Delivered messages**: number of messages that have been delivered to recipients
* **Messages read**: number of messages that have been delivered and read (only works if the end-user has enabled read confirmation in their WhatsApp account)
* **Failed messages**: number of messages that have not been sent
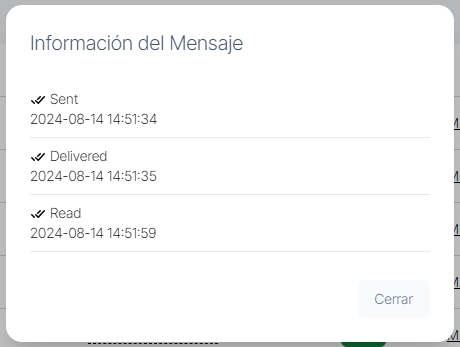
You can also view a log of each message sent by clicking on the ‘More information’ button: